CI/CD and Shell Scripting
CI/CD and Shell Scripting
A. Why CI/CD Matters
CI/CD becomes increasingly important as systems and engineering teams grow.
With one developer and one server, manually deploying changes may still be manageable.
However, imagine:
Without a consistent process, teams could end up combining many changes into one large deployment and hoping nothing breaks.
CI/CD provides a structured way to integrate, validate, and deliver changes more safely.
B. Continuous Integration
CI stands for:
Continuous Integration
The main idea is to validate changes and merge them back into the main branch as frequently as possible.
Instead of keeping a pull request open for weeks with thousands of changes:
CI encourages:
The course describes these as small atomic changes.
Smaller changes are easier to understand and make it easier to identify what caused a problem when something goes wrong.
C. Continuous Delivery vs. Continuous Deployment
CI/CD can refer to either:
Continuous Integration
        +
Continuous Delivery
or:
Continuous Integration
        +
Continuous Deployment
The difference is what happens after the code has been validated.
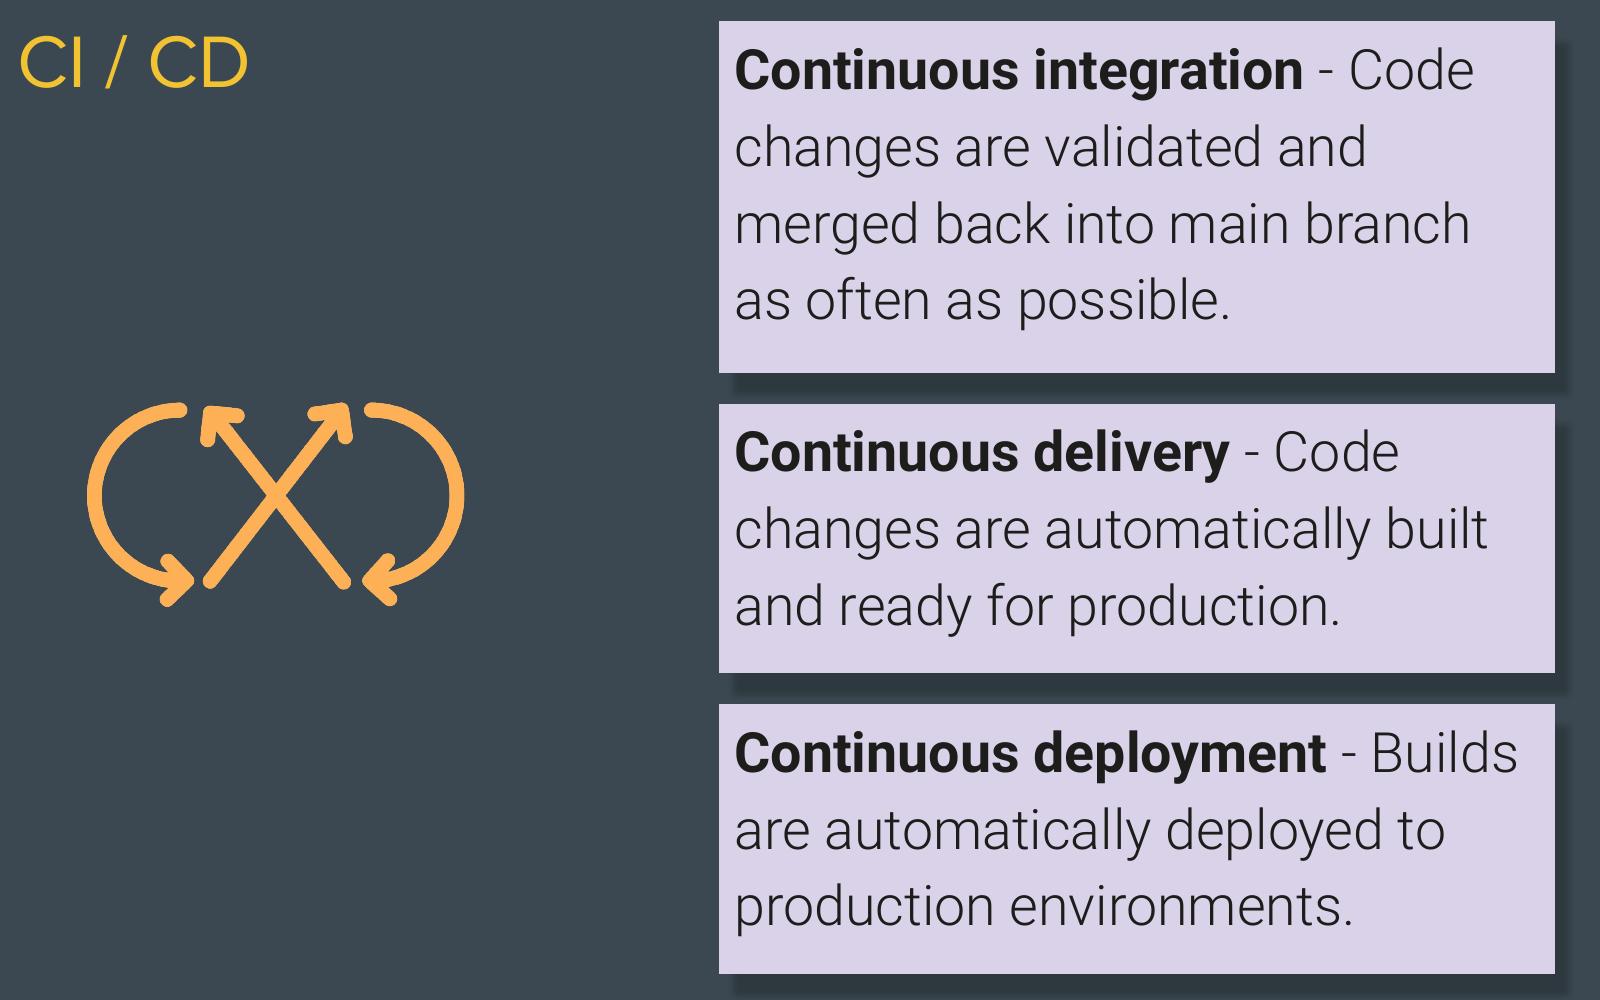
The course slide summarizes the three related CI/CD concepts.
Continuous Delivery
With continuous delivery:
The code is kept in a state where it is ready to deploy, but deployment to production does not necessarily happen automatically.
Continuous Deployment
With continuous deployment:
Validated changes are automatically pushed into production.
The main difference is:
Continuous Delivery
→ Ready to deploy

Continuous Deployment
→ Actually deployed automatically
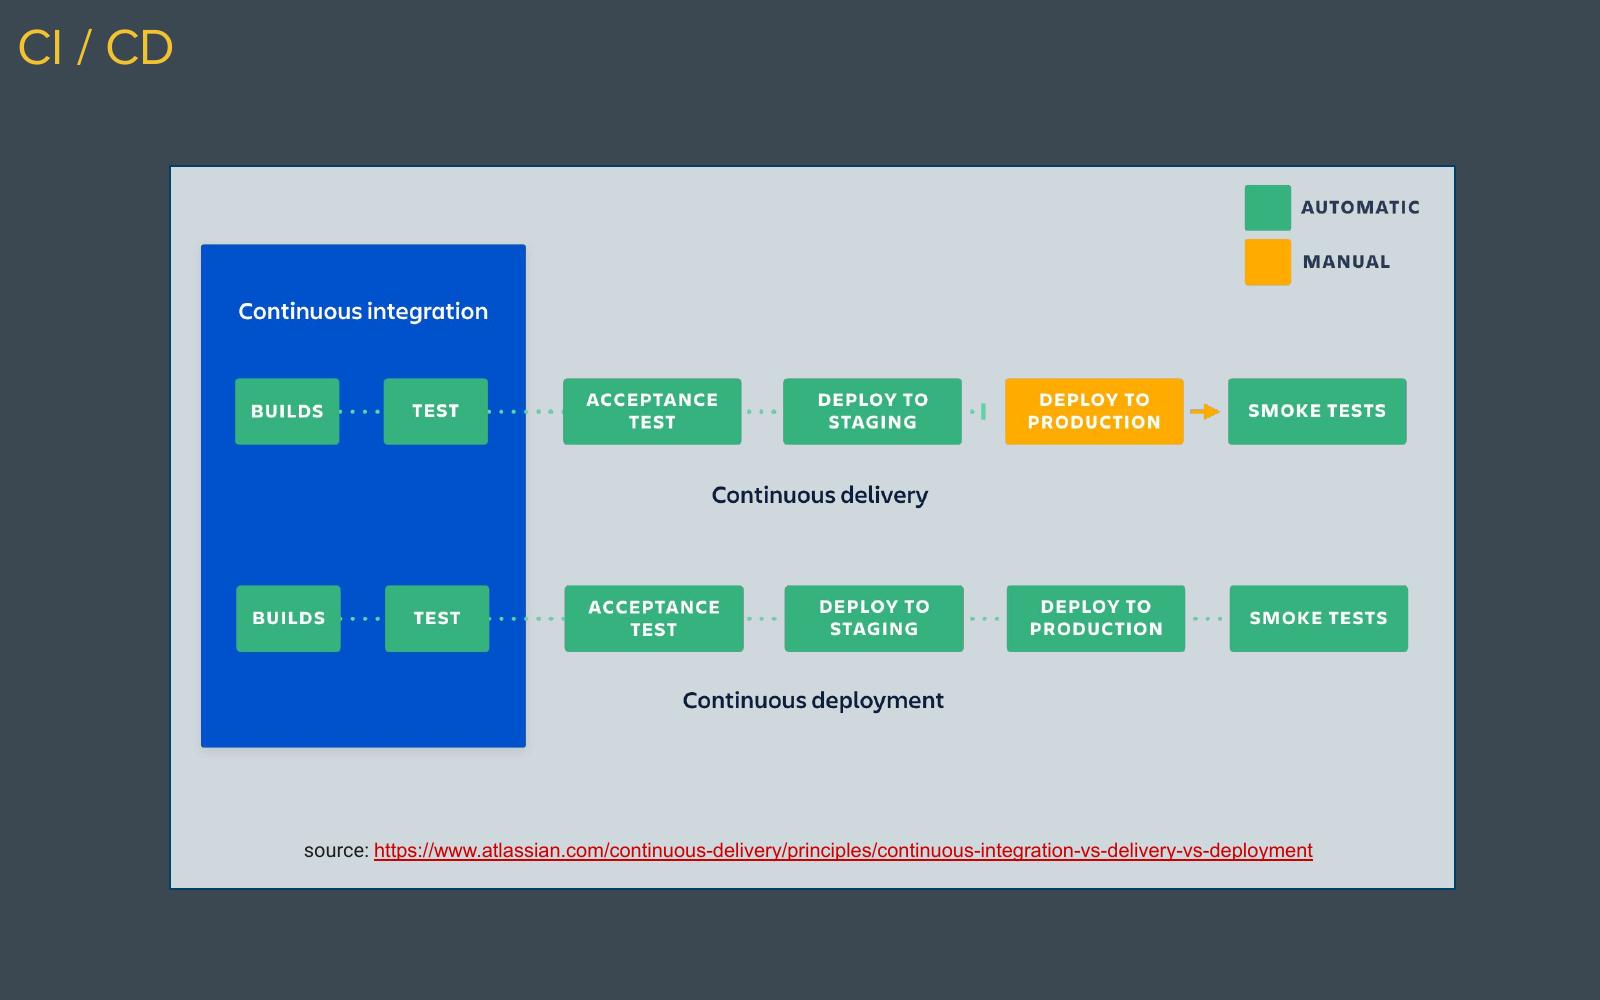
In continuous delivery, production deployment remains a manual step; in continuous deployment, that step is automated.
D. When Continuous Delivery May Be Better
Continuous deployment is not appropriate for every system.
The course uses a healthcare application as an example.
For systems where mistakes could have serious consequences, a team may prefer:
In this situation, continuous delivery provides automation while still keeping a manual checkpoint before production.
The appropriate approach depends on factors such as:
- the company
- the system
- the risk of failure
- how quickly changes need to reach production
E. Testing Is the Core of CI/CD
The course strongly emphasizes that CI/CD is not simply about deploying code faster.
The foundation of CI/CD is:
Testing and validation.
Conceptually:
Without testing and validation, automatically deploying code does not provide the main benefits of CI/CD.
The purpose is to make the code as ready as possible before it reaches production.
Testing is therefore the core of the CI/CD process.
F. CI/CD at Scale
CI/CD becomes especially important when working with systems at scale.
With many developers contributing changes simultaneously, teams need a reliable process for:
- integrating changes
- testing changes
- validating changes
- preparing releases
- deploying changes
Instead of manually coordinating every deployment:
The course emphasizes that CI/CD is essential when managing larger systems.
G. CI/CD Tools and Spinnaker
The course mentions Spinnaker as an example of a powerful CI/CD and deployment platform used at large scale.
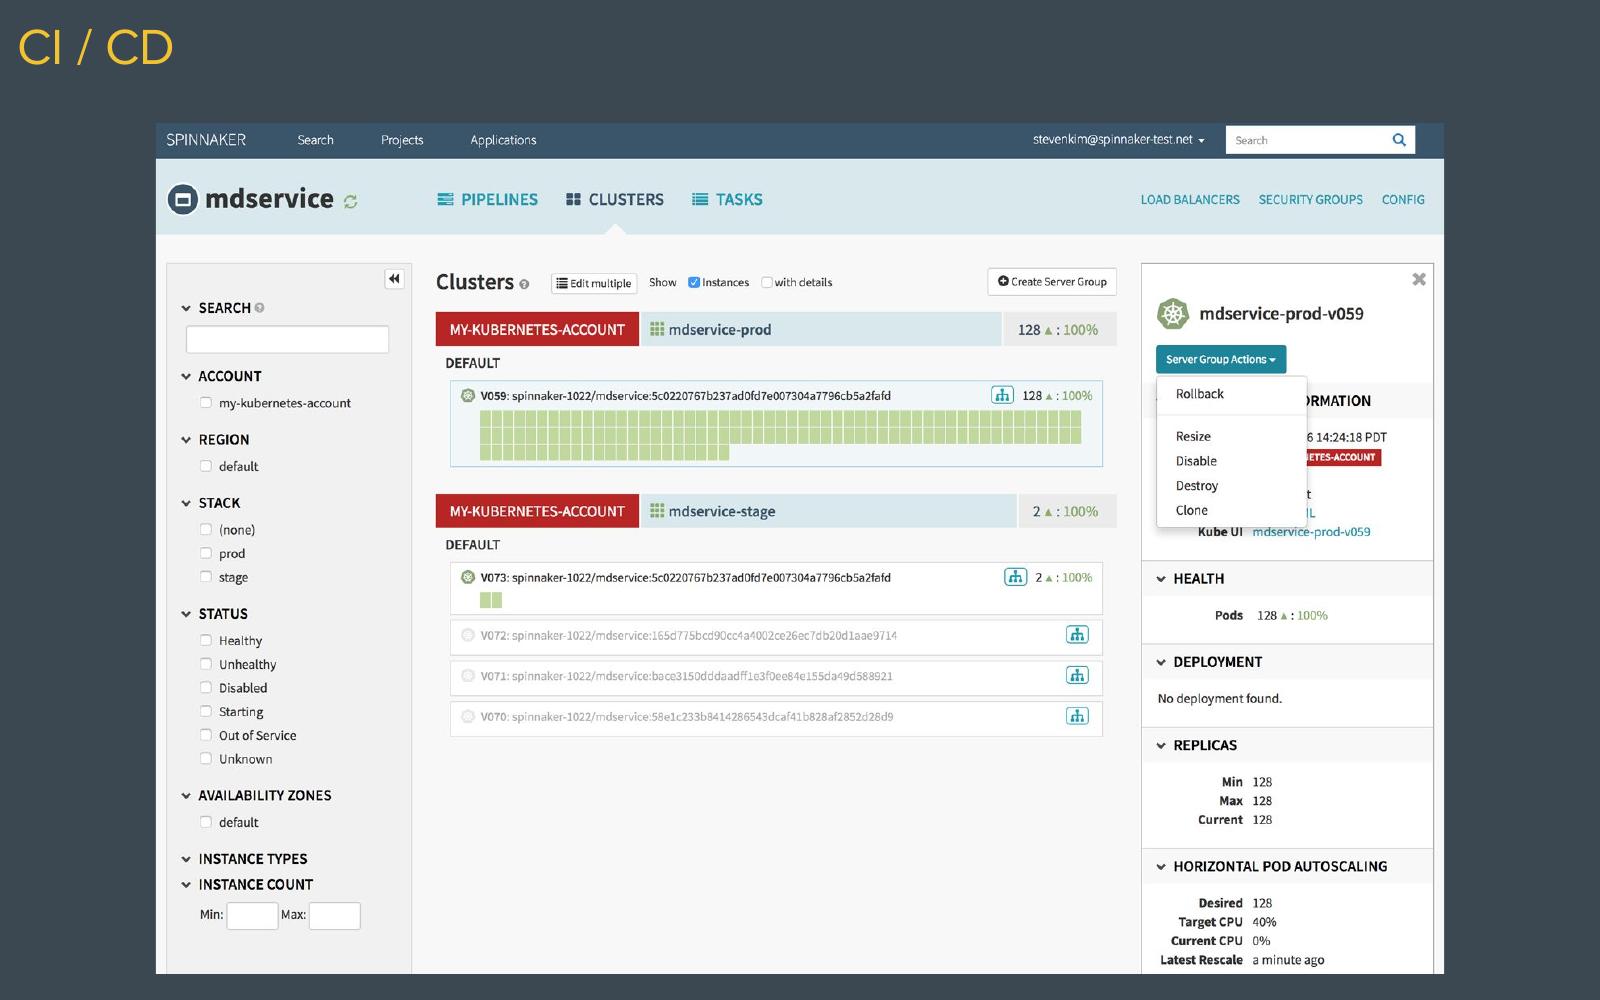
Spinnaker provides a visual interface for managing deployment infrastructure, clusters, and server groups.
At Netflix, tools like Spinnaker can automate infrastructure and deployment tasks that would otherwise require significant manual work.
For example:
Instead of configuring hundreds of machines individually, automation can create consistently configured infrastructure.
However, the course also points out that a tool like Spinnaker would probably be overkill for a small personal project.
The important lesson is:
Use tools that match the scale and complexity of the system.
H. CI/CD Pipelines
CI/CD systems commonly organize their work into pipelines.
A pipeline is a sequence of automated steps that code passes through.
For example:
Each stage performs part of the process required to move code safely toward production.
Together, these stages form the:
CI/CD pipeline
The course again emphasizes testing because pipelines help force teams to think about validation before deployment.
I. Building a Simple CI/CD Example
For this course, using a large CI/CD platform would be unnecessary.
Instead, the goal is to demonstrate the basic idea using simple Unix tools.
Conceptually, the course wants:
The course describes this as a simplified or "fake CI/CD" example.
It is intended to demonstrate the concept rather than represent a production-ready CI/CD system.
Most importantly, the example does not include proper automated tests.
Therefore, it should not be treated as a real production deployment strategy.
J. The Goal of the Simple Pipeline
The goal is to stop manually logging into the server and pulling code every time the application changes.
Instead:
To build this simplified system, the course needs two pieces:
Bash Script
→ Defines what should happen

Cron
→ Defines when it should happen
The Bash script will pull changes from GitHub.
Cron will later execute that script automatically on a schedule.
Shell Scripting
K. What Is a Shell Script?
A shell script is a file containing shell commands that can be executed together.
Instead of manually typing:
command1
command2
command3
we can place the commands inside a file:
script.sh
and execute the script.
Shell scripting is useful for automating operating-system tasks without needing to create a full program using something like:
- JavaScript
- Python
- Java
It is especially useful for small automation tasks.
L. The .sh Extension
The course creates a file such as:
vi test.sh
The .sh extension indicates that the file is a shell script.
Conceptually:
M. Find the Bash Location
Before writing the shell script, we need to know which shell will execute it.
A shell is a program that interprets commands and allows us to interact with the operating system.
Bash is one type of shell.
Shell
├── Bash → Linux, older macOS
├── Zsh  → macOS (current default)
├── sh   → Unix / Linux
└── Fish → Linux / macOS (optional)
So the relationship is:
Shell is the general category, while Bash is one specific type of shell.
Since this server is running Ubuntu, where Bash is commonly used as the default shell, we use Bash to execute the script.
To find where Bash is installed, run:
which bash
This returns something similar to:
/usr/bin/bash
This path tells us where the Bash program is located on the system.
We can then use this path in the script's shebang:
#!/usr/bin/bash
which tells the operating system:
Use Bash to execute this script.
N. The Shebang
At the beginning of the script, the course adds a shebang:
#!/usr/bin/bash
The first two characters are:
#!
This is sometimes called:
shebang / hashbang
It tells the operating system which interpreter should execute the script.
Conceptually:
#!/usr/bin/bash
       ↓
Execute this script using Bash
O. Basic Shell Script Input
The course demonstrates that shell scripts can receive user input.
For example:
read -p "What is your name? " name
read
→ A Bash command that reads input from the user

-p
→ Stands for prompt
→ Displays a message before waiting for input

"What is your name? "
→ The prompt shown to the user

name
→ The variable where the user's input is stored
Conceptually:
The read command waits for input from the user.
The input is then assigned to a variable.
P. Output with echo
The echo command prints output to the terminal.
For example:
echo "Have a great day, $name"
Conceptually:
This simple example demonstrates that shell scripts can:
- execute commands
- accept input
- use variables
- produce output
The complete example shown in the slides combines a command result, user input, variables, and output:
#!/usr/bin/bash

now=$(date +"%r")
read -p "What is your name? " name
echo "The time is $now. Have a wonderful day, $name"
$(date +"%r") runs date and stores its result in the now variable. After saving the file as test.sh and granting execute permission, run it with:
./test.sh
Example output:
What is your name? Jem
The time is 05:30:09 AM. Have a wonderful day, Jem
Q. Shell Scripts Need Execute Permission
Creating a shell script does not automatically mean it can be executed.
The course checks the file permissions and discovers that execute permission is missing.
Conceptually:
The permissions must therefore be changed.
The course temporarily demonstrates this using very permissive permissions, while explicitly warning that this is not a good security practice.
The important idea is:
A script needs execute permission before it can be executed directly.
R. Why Shell Scripts Are Useful
Shell scripting provides a lightweight way to automate commands on a machine.
Instead of writing an entire application:
a simple system task can often be handled with:
The course does not suggest using shell scripts for every complex application.
Instead, shell scripting is presented as a useful tool for small automation tasks.
Create the GitHub Pull Script
S. Automate git pull
The original goal is to automatically pull changes from the main branch.
Normally, we can run:
git pull origin main
Instead of manually running this command every time, we can put it inside a Bash script.
T. Create github.sh
The course creates a new script:
vi github.sh
The script contains:
#!/usr/bin/bash

git pull origin main
This is essentially a two-line automation script:
#!/usr/bin/bash
→ Use Bash to execute the script

git pull origin main
→ Pull the latest main branch from GitHub
So instead of manually typing the Git command, the server can execute the script.
U. Make the Script Executable
The script needs execute permission before it can run directly.
The course changes its permissions:
chmod 700 github.sh
700 means:
Owner
7 = read + write + execute

Group
0 = no permissions

Others
0 = no permissions
Therefore:
700
 ↓
rwx------
The owner can:
- read
- modify
- execute
Other users receive no permissions.
V. Test the GitHub Script
After changing the permissions, the script can be executed to verify that it works.
Its job is simply:
At this point, the course has created a way to automate the action.
The remaining problem is:
When should this action run?
Currently:
We have:
→ A script that can pull from GitHub

We still need:
→ A way to run it automatically on a schedule
That is where Cron comes in next.