Set SSL Certificate for Free on Docker Nginx — Using Certbot

1. Preliminary summary
At post【Docker 筆記】部署 React 到 AWS EC2 we demonstrated how to deploy a React app on an EC2 instance and access it using its IP address. However, accessing a website via an IP is not ideal. This post will guide you through setting up a domain URL and installing an SSL certificate so you can access your website securely.
Blog posts support Docusaurus Markdown features, such as MDX.
Disclaimer: This process is not identical to those used by large tech companies, as they often implement advanced automated solutions for SSL renewal. This guide focuses on a simpler, manual approach that is a step toward optimization. Unlike many articles that use tools like Docker Compose or Kubernetes, this guide keeps it basic, as I am still exploring those technologies.
2. Preparatory work
Before starting, ensure the following prerequisites are met:
- EC2 Instance with React App: Your React app is running on a Dockerized Nginx container, and you can access it via its IP address.

-
Domain Name: Purchase a domain from a web hosting service (e.g., GoDaddy, Gandi.net).
-
Domain Configuration: Map your domain to your EC2 instance’s IP address. For GoDaddy, this involves setting up A records in the DNS settings.
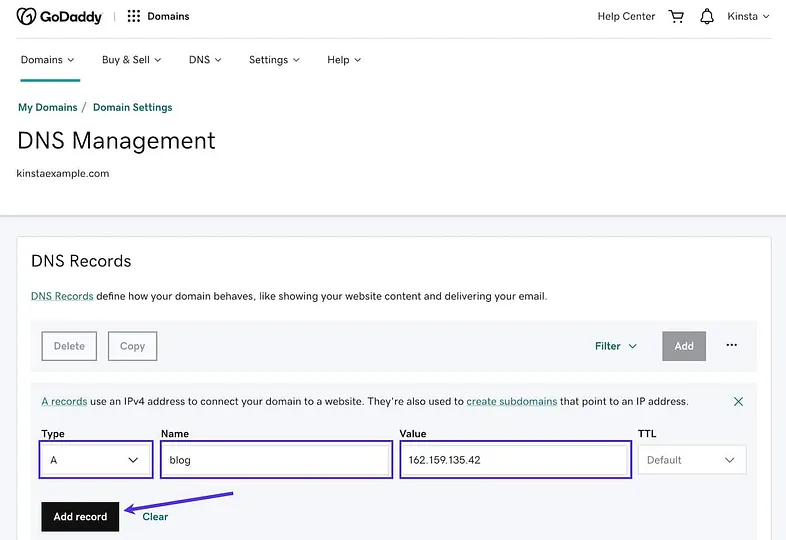
- Security Group: Configure the EC2 instance’s security group to allow inbound traffic on ports 80 (HTTP) and 443 (HTTPS).
3. Obtain an SSL Certificate from Certbot
Certbot is a free, open-source tool for obtaining SSL certificates. Follow these steps to generate the necessary files for your domain. In the end we need two files from Certbot for configuring SSL certificate on our Docker container environment:
1. fullchain.pem
2. privkey.pem
- Install Certbot: For macOS, use Homebrew:
brew install certbot
For other systems, refer to Certbot’s installation guide.
- Run Certbot manually:
sudo certbot certonly --manual -d [domain-url]
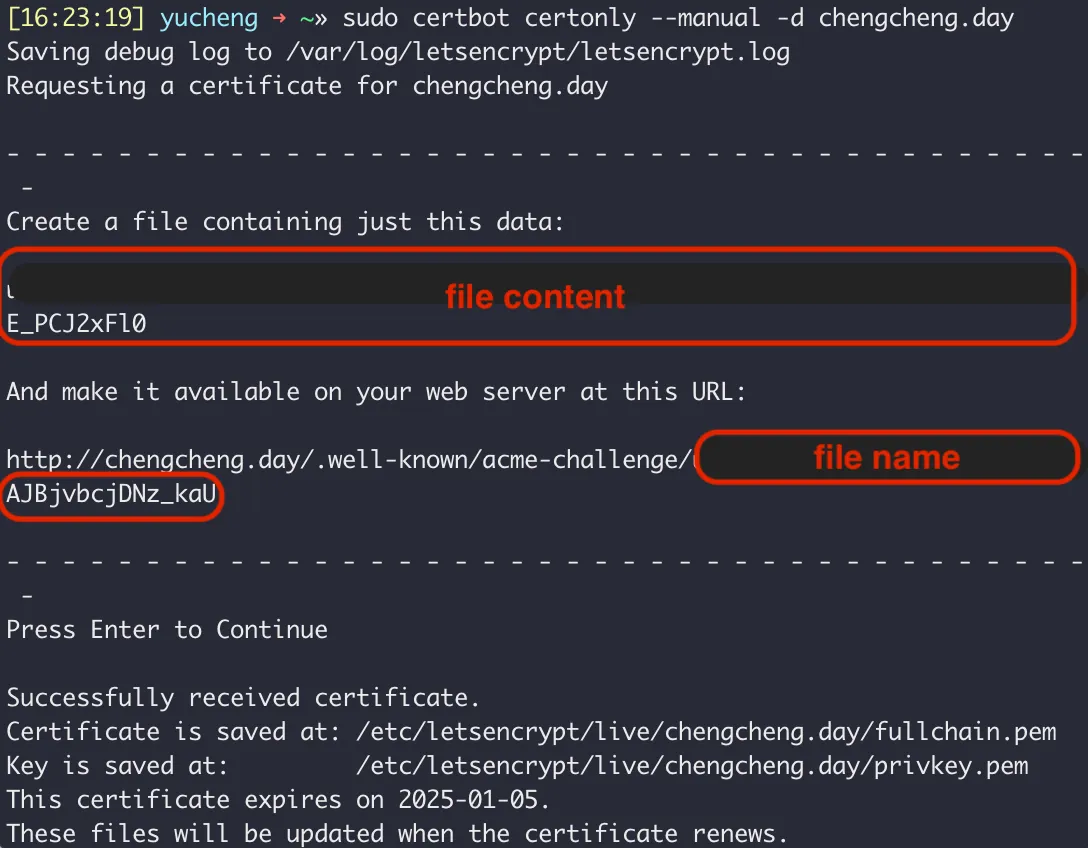
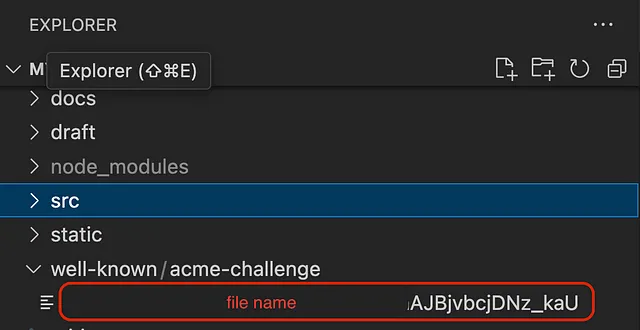
Certbot will guide you through the process, including creating a .well-known directory and specific challenge files for domain validation.
During the process, you may encounter a prompt that says, “Press Enter to Continue.” At this point, Certbot will display instructions to create a file with specific data at a designated path.
Before proceeding, return to your project and complete the steps outlined in the First Deployment section to configure SSL. Once you’ve finished those steps, come back to the terminal and press Enter to continue.
4. First Deployment: Configuring SSL Certificate
-
Create Nginx Configuration Add an
nginx.conffile to your project root with the following content. Replace[domain-url]with your domain, for me, i setchengcheng.day.server {listen 80;server_name [domain-url];# define the location of .well-knownlocation /.well-known/acme-challenge/ {root /usr/share/nginx/html;allow all;}location / {root /usr/share/nginx/html;index index.html index.htm;try_files $uri $uri/ /index.html;}#error_page 404 /404.html;# redirect server error pages to the static page /50x.html#error_page 500 502 503 504 /50x.html;location = /50x.html {root /usr/share/nginx/html;}} -
Update Dockerfile
Add the following lines to your Dockerfile:
COPY nginx.conf /etc/nginx/conf.d/default.conf
COPY ./well-known/acme-challenge /usr/share/nginx/html/.well-known/acme-challenge
Now the Dockerfile will be like:
# Stage 1: Build the app
FROM node:alpine as build
WORKDIR /app
COPY package.json .
RUN npm install
COPY . .
RUN npm run build

# Stage 2: Server with Nginx
FROM nginx:alpine
WORKDIR /usr/share/nginx/html
# It means that we are going to work in this directory
RUN rm -rf ./*
# Remove all the files in this directory
COPY --from=build /app/build .
# Copy the build folder from the previous stage to the current directory,
# --from=build means that we are copying from the build stage

# COPY nginx.conf /etc/nginx/nginx.conf
COPY nginx.conf /etc/nginx/conf.d/default.conf

# set nginx config
COPY ./well-known/acme-challenge /usr/share/nginx/html/.well-known/acme-challenge

EXPOSE 80 443
# Expose port 80 443
ENTRYPOINT ["nginx", "-g", "daemon off;"]
- Edit your
cicd.ymlfile to set up both HTTP and HTTPS port mappings. Be sure to replace[image-name]with the name of your Docker image. Here's an example configuration:
name: CICD
on:
  push:
    branches:
      - deploy-to-ec2
# It will run the workflow on every push to the deploy-to-ec2 branch

jobs:
  build:
    runs-on: ubuntu-latest # The virtual environment to run the job on
    steps: # A sequence of tasks that will be executed as part of the job
      - name: Checkout Source # The name of the step
        uses: actions/checkout@v4 # The action to run for the step
      - name: Login to Docker Hub
        run: docker login -u ${{ secrets.DOCKER_USERNAME }} -p ${{ secrets.DOCKER_PASSWORD }}
      - name: Build Docker Image
        run: docker build -t [image-name] . # after the -t flag, you need to specify the name of the image and that is you created in Docker Hub
      - name: Push Docker Image
        run: docker push [image-name]:latest

  deploy:
    needs: build
    runs-on: self-hosted
    # this is a custom runner, and when you set up a self-hosted runner, it should be the same as the name of the runner
    steps:
      - name: Login to Docker Hub
        run: docker login -u ${{ secrets.DOCKER_USERNAME }} -p ${{ secrets.DOCKER_PASSWORD }}
      - name: Pull image from Docker Hub
        run: docker pull [image-name]:latest
      - name: Delete Old Container
        run: docker rm -f reactContainer
      - name: Run New Container
        run: docker run -d -p 80:80 -p 443:443 --name reactContainer [image-name]:latest
        ```
-
Push Changes Push your changes to GitHub and trigger the CI/CD pipeline to deploy.
-
Verify Deployment
Once the deployment is complete, test it by running the following command to check if your application is accessible:
curl -H "Host: [domain-url]" http://XX.XXX.XXX.XXX
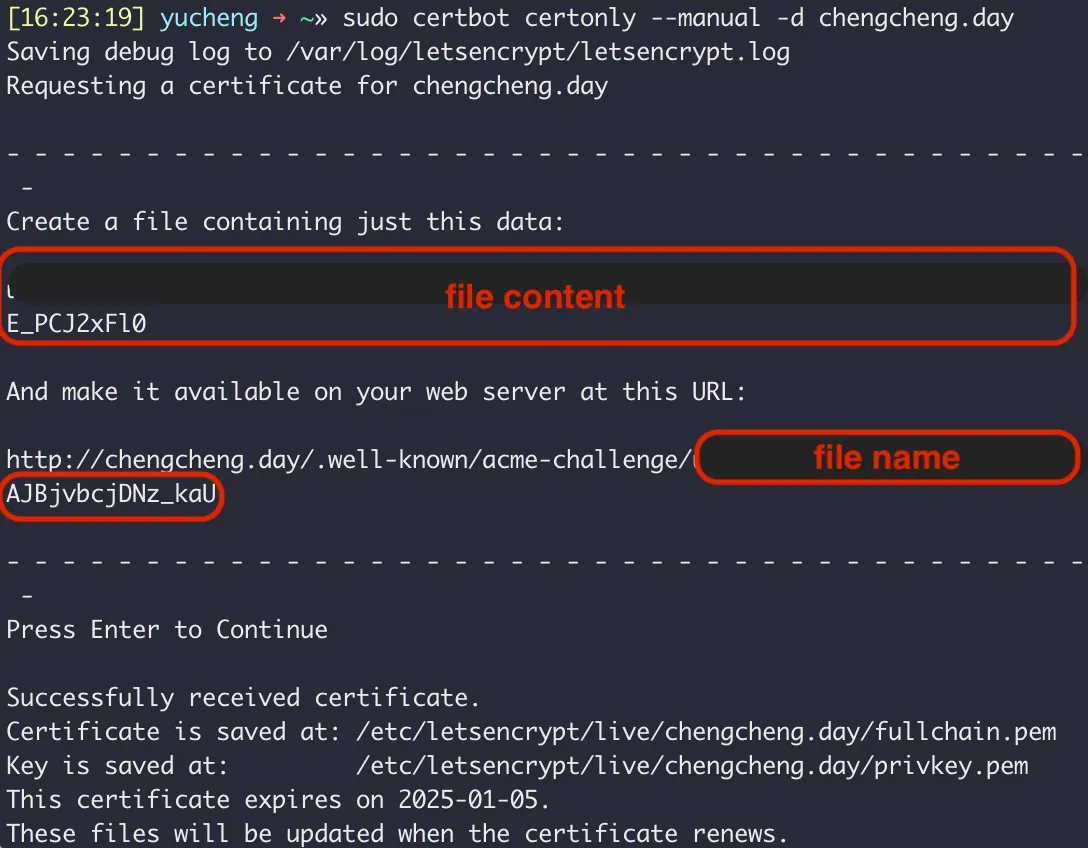
If the deployment is successful, you can return to 3. Obtain an SSL Certificate from Certbot and press Enter to proceed with generating the fullchain.pem and privkey.pem files. These files are required for configuring SSL in your Docker environment.
5. Second Deployment: Enabling SSL on Your Domain
1. Prepare SSL Certificates
Move the generated fullchain.pem and privkey.pem files to a certs folder in your project root.

2. Update Nginx Configuration
Extend your nginx.conf file to support HTTPS:
# Support HTTPS
server {
    listen 443 ssl;
    server_name [domain-url];

    # Set SSL certificate
    ssl_certificate /etc/nginx/ssl/fullchain.pem;
    ssl_certificate_key /etc/nginx/ssl/privkey.pem;

    location / {
        root   /usr/share/nginx/html;
        index  index.html index.htm;
        try_files $uri $uri/ /index.html;
    }
}
3. Modify Dockerfile
Add lines to copy SSL certificates into the container:
COPY ./certs/fullchain.pem /etc/nginx/ssl/fullchain.pem
COPY ./certs/privkey.pem /etc/nginx/ssl/privkey.pem
Now the Dockerfile will be like:
# Stage 1: Build the app
FROM node:alpine as build
WORKDIR /app
COPY package.json .
RUN npm install
COPY . .
RUN npm run build

# Stage 2: Server with Nginx
FROM nginx:alpine
WORKDIR /usr/share/nginx/html
# It means that we are going to work in this directory
RUN rm -rf ./*
# Remove all the files in this directory
COPY --from=build /app/build .
# Copy the build folder from the previous stage to the current directory,
# --from=build means that we are copying from the build stage

# COPY nginx.conf /etc/nginx/nginx.conf
COPY nginx.conf /etc/nginx/conf.d/default.conf

# Copy local certs to container location
COPY ./certs/fullchain.pem /etc/nginx/ssl/fullchain.pem
COPY ./certs/privkey.pem /etc/nginx/ssl/privkey.pem

# set nginx config
COPY ./well-known/acme-challenge /usr/share/nginx/html/.well-known/acme-challenge

EXPOSE 80 443
# Expose port 80 443
ENTRYPOINT ["nginx", "-g", "daemon off;"]
-
Redeploy Push your changes to GitHub and redeploy the project. And visit
https://[your-domain-url]to verify the SSL setup.
References:
縮網址服務實作記錄 (2) — 基於 Docker 的 Let’s Encrypt 申請與設定
如何使用 Certbot 命令列工具建立免費的 TLS/SSL 頂層網域憑證